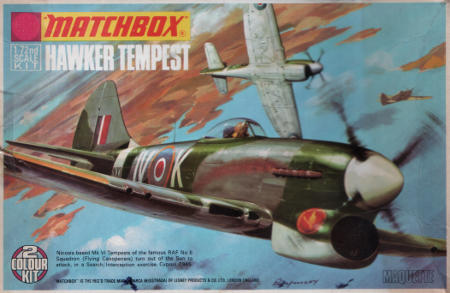
Wulf in Johnson's clothing group build Tempest
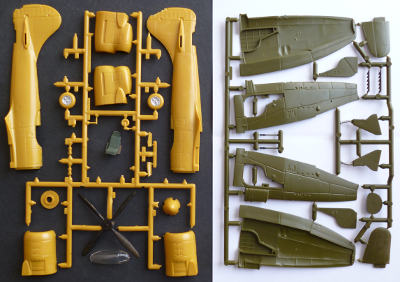
This kit was bought second hand, and turned out to be started and incomplete. I could have
gotten my money back, but I had an itch to scratch, and despite it's mangled state, this
kit ought to do. The itch in question is finding out if I can build an old Matchbox kit
without painting it, but with all the gaps and cracks filled in, and still make it look
good, and then, as a second stage build, paint it up properly, without the benefit of being
able to work on still separate parts. For this purpose, it is largely irrelevant whether
the paintwork is correct for the kit.
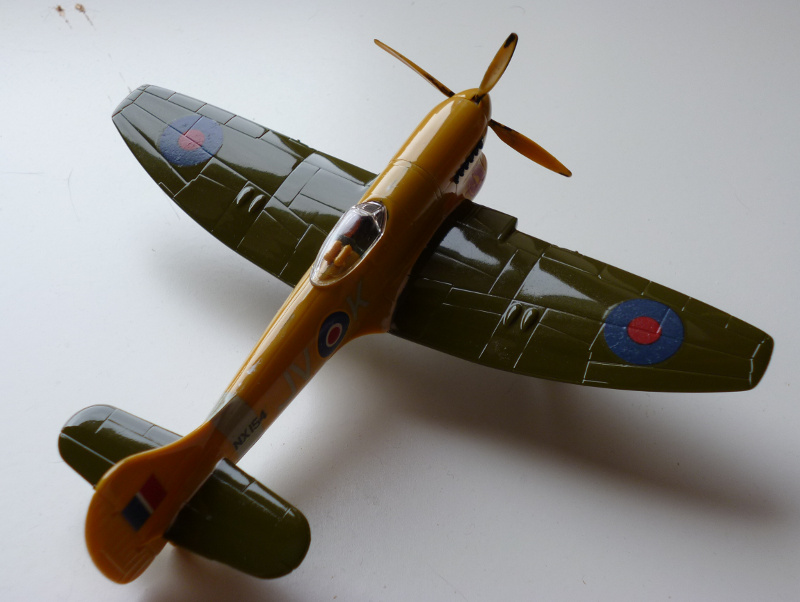
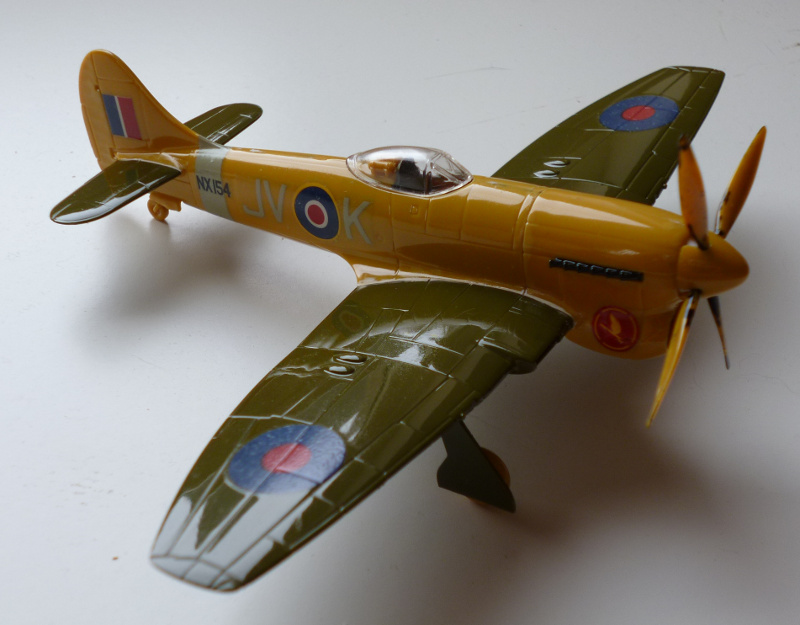
The kit is now completely assembled, and has had it's filler and sanding job. I consider the
result to be less than satisfactory, because I also smoothed over and sanded out some cases
of incorrect fit. This results in vaguely defined areas of filler, which is not the effect I
wanted. On a future attempt, I will restrict myself to gap filling during this stage, and
leave corrections (and any sinkholes) for the second stage. This will be more difficult,
and require more thickery, but I think i will be doable.
I've also apllied the original decals that came with the kit. They too were beyond normal
use, as the waxpaper had become fused to the decals, and there was plenty of residue from
disintegrating backing paper as well. The options were to ditch them, or to stick them on
for effect, so guess what I chose. It should be noted that the decals themselves still
perform perfectly.
What remains is a coat of high gloss varnish, scheduled for tomorrow, to restore an overall
gloss finish to the plastic.
2013-06-16
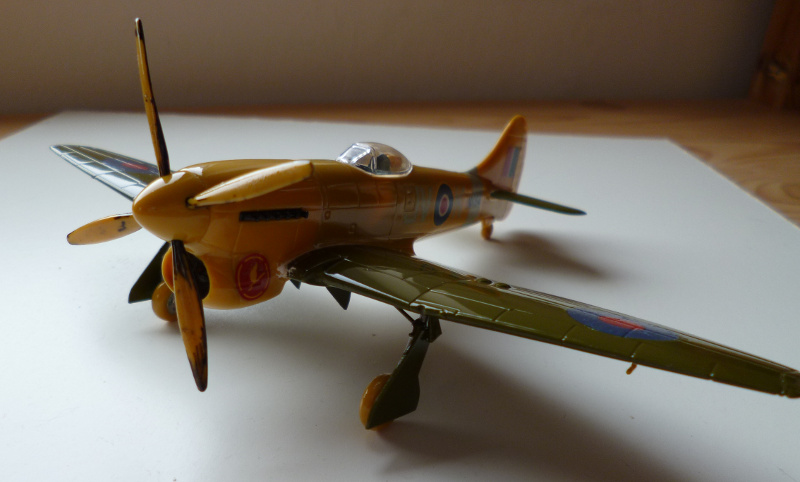
Stage one is completed; the kit is built straight from the box. I like the result; on a kit
that hasn't had some paintwork done before I get my paws on it, this should look exactly as
an old Matchbox should look.
|
|
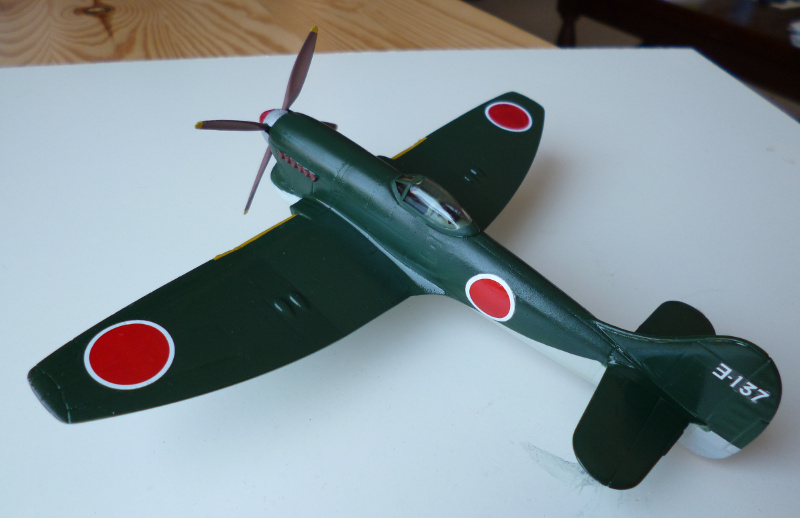
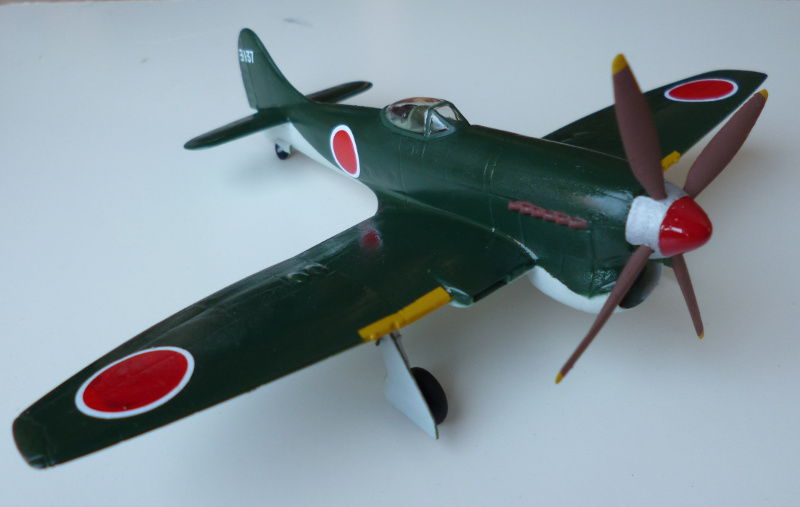
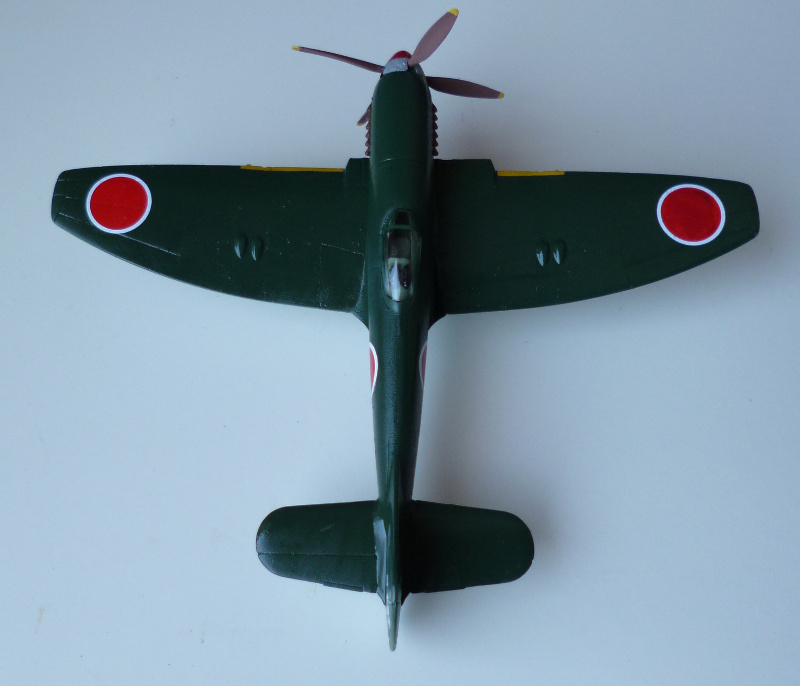
Well, that accounts for the Wolf, now it's time to raid Mr. Johnson's clothes line. Or, more to the point in this particular case, Sakai-san's. The plan is to use the markings of the plane Sakai Saburo flew from Yokusuka in 1945, stolen from a Hobby Boss Zero. The Hobby Boss kit was bought for the express purpose of donating it's decals; it was cheaper to buy this kit than to buy a set of aftermarket decals without any plastic.

2013-06-20
I took a shot at priming the kit as a preparation for airbrushing on the Japanese scheme.
Bad idea. The primer was rather too hot, and the result not even remotely cool.
The remaining evenings this week were mostly spent getting most of that mess off the kit again.
The result wasn't pretty, but at least I managed to 'only' break off the tailwheel in the process.
The fundamental toughness of the Matchbox decals is noteworthy. The kit
has been attacked with acetone and sandpaper, not to mention the potential effects of the primer,
and the decals just din't seem to care.
The bottom side has just been sprayed light grey. It looks like it might be presentable to all
but very close inspection, so there's still hope. From an experimental point of view, it has become
clear that when I do this for real, I should not put decals on the unpainted plane. They are thick
enough to show as ridges through the subsequent paint job.
2013-06-23
I've been at it with the airbrush, and the main grey and green, as well as the yellow wing edges, are on.
Somehow, paint from an airbrush seems to have great talent for flying around edges. I took great care
only to shoot the green from the top, and yet the entire bottom of the plane is covered in a very fine
green mist. Any paint at the bottom must have done a mid-air 180 degree turn against gravity to hit the
bottom. I guess for green paint, that must be the promised land or something.
Still, it's my kit, and I'm the boss around here. Whipped out the hairy stick, and to my
immense relief, it looks like the paint will blend right in. I also like the effect of the green mist
blending with the otherwise disappointing coverage of the grey paint.
Definitely one of those Bob Ross moments.
I also managed to miss part of the fuselage sides while airbrushing (go figure, paint everywhere I didn't
want it, and no paint where it needed to go. Not my best day in the paintshop), but it looks like those
corrections too will blend nicely.
2013-06-30
Finished. She didn't much appreciate being painted this way and put up a fight over it, but that shouldn't
really come as a surprise, this being the enemy's uniform and all.
|
|
Finishing materials:
Dupli-color Deco clear varnish unpainted finishMotip primer overall(disaster)
Motip primer overall
Hu196 overall
Hu195 top
Sylvacryl overall (slightly too much, yellowing)