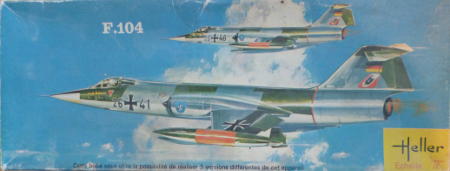
Heller TF-104G Starfighter
Project start 2023-02-10
2023-02-10, 16:11
I was in desperate need of an inspiration restoration project after the supposedly festive
curse called December, and having been defrauded of quite a bit of money by the postoffice,
so was time to blitz something. It was a bit of a spur-of-the-moment thing, with no advange
warning, but that's sort of appropriate for Starfighters; the buggers scared me silly ages
ago at an airshow by zipping past so low and fast you only heard the scream of the engines
when they were already on top of you.
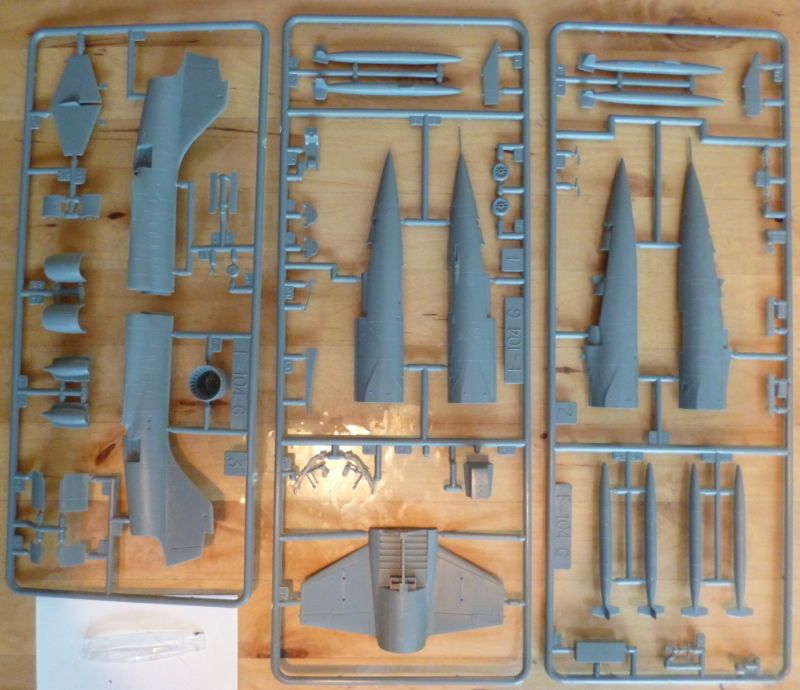
I had this ancient Heller kit sitting in the stash looking for a purpose, and I guess it just found one.
Being an old kit, I expected to be needing quite a bit of filler and sandpaper, which would usually disqualify it for blitzing. However, ve haf a zekret veapon that needed testing: UV curing putty. Since I'm always looking for new and exciting ways to shoot myself in the foot, I intended to use this build to see how well and, especially, how fast this worked.
It's barely visible in the picture of the sprues, but there is a canopy there. Canopy, singular. That meant I was forced to build the two seater. I didn't particularly mind, but also note the ejection seat, again, singular. Like the single seater canopy, one of the seats had long since been lost. Not the best combination of parts to lose, so I had to start the party by building a replacement second seat.
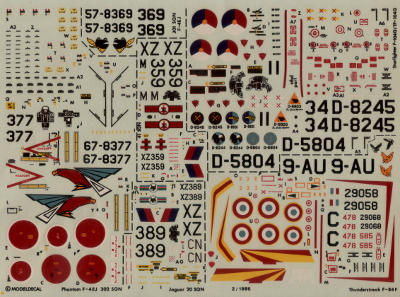
The decals, not unexpectedly, had yellowed to a horrid degree, and at the time of writing were being re-educated by a bunch of powerfull UV lamps. I hoped they would clear up fast enough, because I really wanted to do this one bare metal with Danish markings. If the decals were to prove too resistant, I would have to go for overall green instead.
2023-02-10, 16:55
Oh great and terrible crapeousness.. it's not just the second seat that went AWOL,
the rear cockpit tub also wandered off to parts unknown.
2023-02-10, 17:30
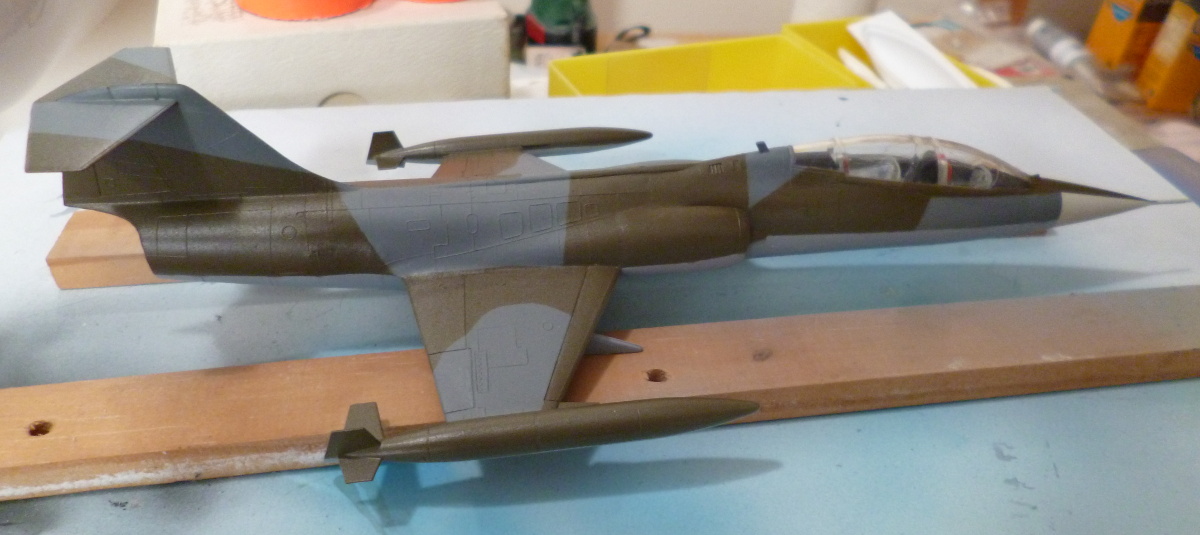
Here's the state of play at 17:30
The tail section is showing off it's near perfect fit.
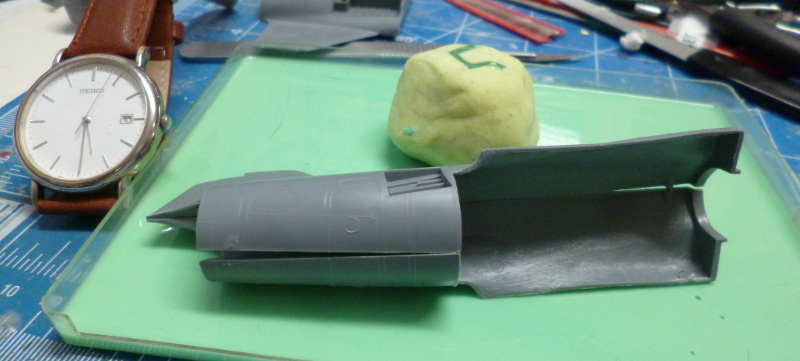
The blob of plasticine clay behind it had the front tub pressed into it, and the
resulting hole filled with resin. Hopefully, this would give me a sufficient base to
scratch the rear tub on. I wasn't not going to be overly picky about the results though..
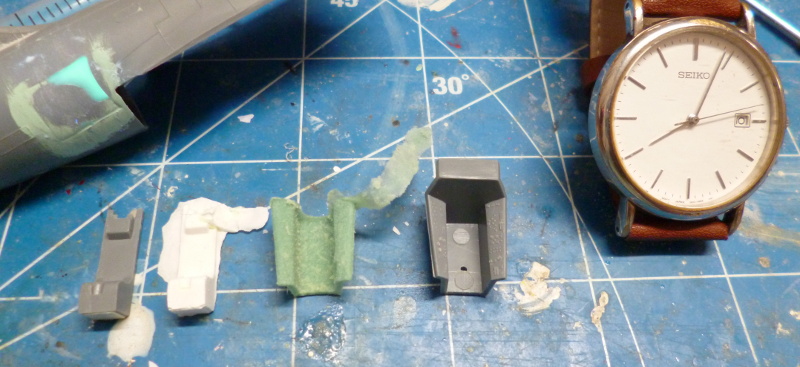
A similar lump of clay was in the freezer, with the sole seat still pressed into it. Once properly frozen, I planned to pull out the seat and replace it with dental plaster to produce the second seat.
I found some better tanks and sidewinder launch rails in the stash, courtesy of a Hasagawa F-104 destined to join the Vikings demo team of the Marineflieger. They flew their displays in completely clean fighters, so the tanks won't be missed.
2023-02-10, 20:00
The UV curing putty (actually Green Stuff resin) works fast, ten to twenty seconds
of UV and it's cured. It sands well too, but there's one drawback; since this stuff
was intended to create "toxic" pools and puddles, it's translucent, meaning it's
very hard to see what you're doing while sanding. Also, once cured it is quite hard,
so sanding takes some doing, which is not necessarily helpful in preserving fine details
close to it.
The plaster seat needed quite some finishing. I had difficulty getting the original out of the clay, and this caused damage with shows in the cast. The resin copy was pretty much what I'd expected.
2023-02-11, 13:39
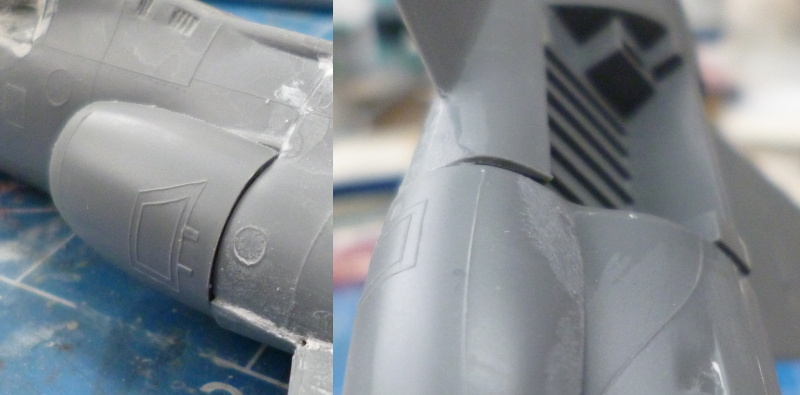
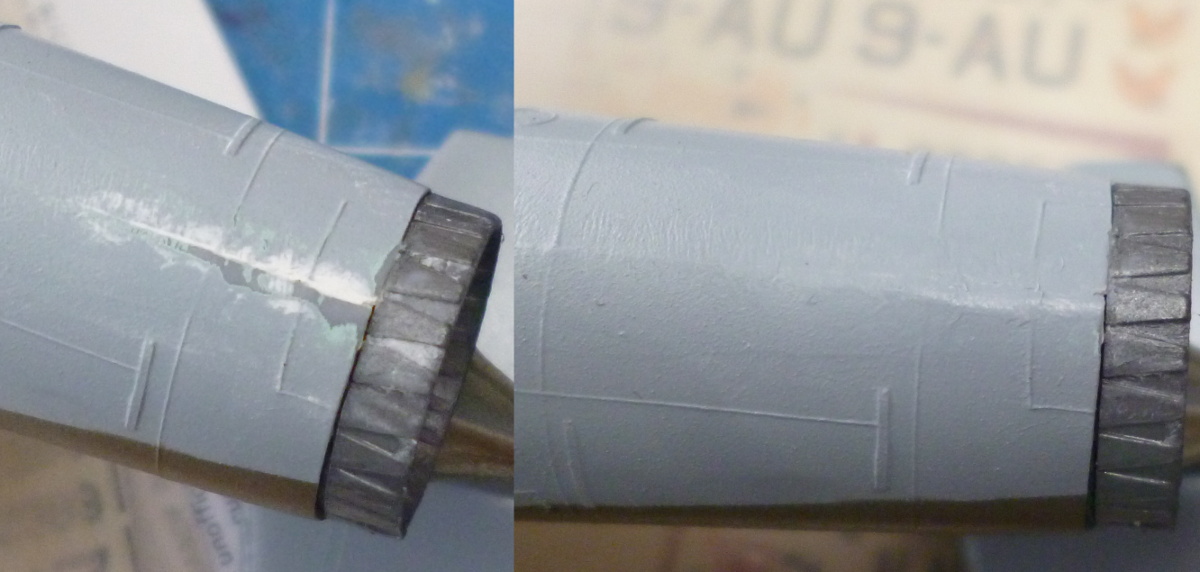
The kit finally threw some really nasty fit issue at me..
2023-02-11, 15:00
Fairing over the steps at the bottom of the fuselage turned out to be relatively
simple, maybe fifteen minutes worth of dry fitting and filing. The top and sides
were a different matter.
The steps were large enough that a fair amount of filler volume was going to be
necessary. Multiple thin (and thus fast drying) filler and a big blob of UW resin
both had the same disadvantage, quite a lot of detail destroying filing and sanding
required. Didn't really feel like that, so I switched to milliput.
2023-02-11, 16:00
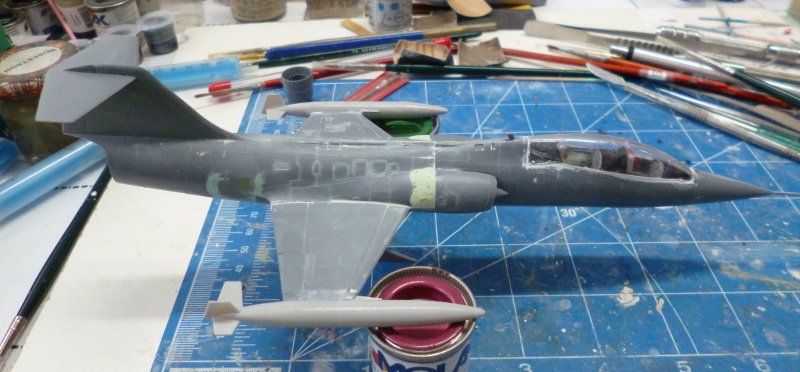
24 hours have passed, time's up, and this critter isn't done. Here's what it looks
like at the end of the blitz run
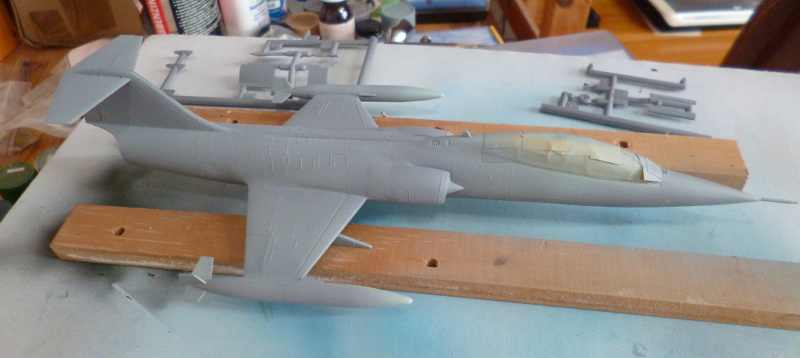
2023-02-16
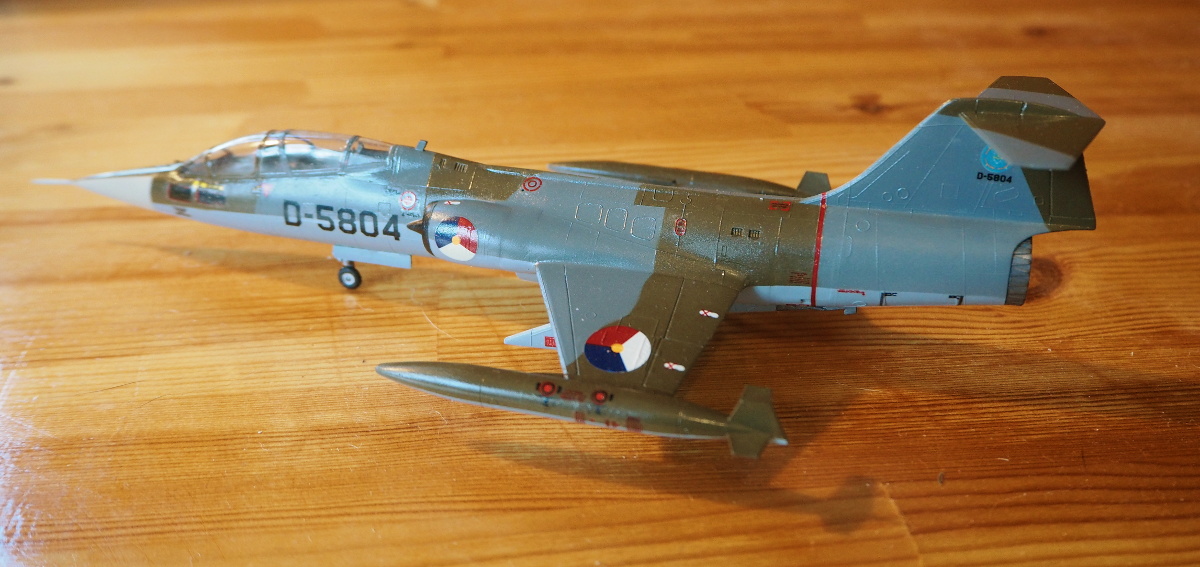
Given that this is no longer a blitz, I have some extra options where markings
are concerned. I was never overly enthousiastic about an overall green airplane,
and I doubt the decals are sufficiently de-yellowed for NMF, but Starfighters
have worn many colours. One of the local IPMS gang kindly donated Model Decal
sheet 43 to the cause, which has markings for a Dutch TF-104G. Three colour
camouflage, which I wouldn't have considered during the blitz, but which suits
my current purpose perfectly.
These machines were painted in RAL colours, but for many model paint manufacturers, those seem to be a bit of an afterthought. As pointed out earlier, I'm always looking for new ways to get into modelling trouble, so, instead of looking for equivalents, conversions, what have you, and to satisfy my curiosity, I went looking for RAL colours. Several pages down in the search engine results, I found a company called Fire Scale Modeler. After I got over the dyslectic translation to Fine Scale Modeler, I found they have quite a RAL range. The paints are acrylic laquers, which aren't my favourite to be honest, but curiosity is tied only with temptation for irresistability, and I just fired off an order for a set of paints. We'll see how well they work out.
2023-02-25
I've shot a coat of some horrible mint green (sold as light blue) over the entire
airframe, just to reveal any remaining problems with seams. There's a lot of work
left here, but not as much as I'd feared. Still, I've got time now, might as well use it.
2023-03-05
The Starfighter has gone through a few iterations of filling, sanding, and priming-for-visibility.
I intend to unmask the canopy before the next colours go on, clean it up properly, and mask with
rather more precision. I usually paint the canopy frames by hand, but that won't really
be an option here, because the paints are pre-thinned for airbrush. They still work off
the hairy stick of course, but hand painting multiple coats over transparencies is likely
to be "interesting". Instead, I'll try to use better masking, combined with some scrap
decal paper painted along with the model itself, and then cut into strips to make the frames with.
2023-03-12
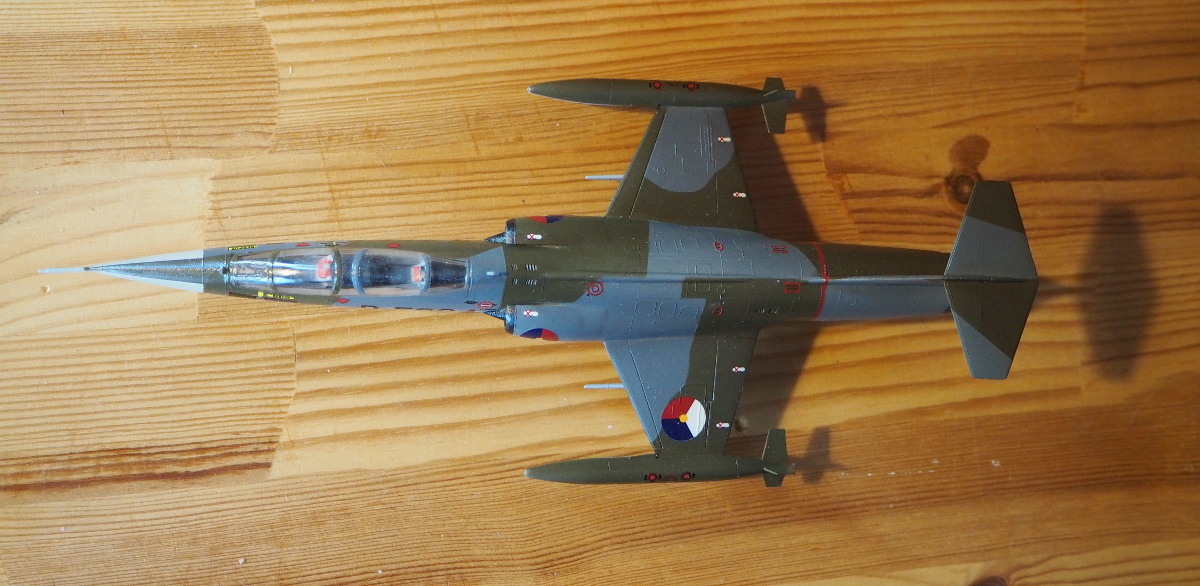
Main airbrushing is done. The camo scheme is a bit weird; the wings are in a typical
wavy pattern, while everything else is a splinter scheme. No idea who came up with
that or why, but unless multiple references are messing up, that's what was used.
The paints handled well. Despite not having been particularly careful about preparation or masking and such, there's only a very small spot where the paint came off with the tape. I'm more concerned about some overspray on the wing pylons and lower wing surfaces. I'm not sure my usual tricks for dealing with this will work with these very thinned, very fast paints. Painting the canopy frames (I got overconfident and decided to forgo decal trickery is also going to be a blast; a small test has proven the solvent in these paints will bite into the plastic, and while there is a protective coat of gloss varnish over the transparency, I usually use a brush dipped in solvent to fix minor slops of the brush and I'm now sure how well the varnish will bear up. We'll see how well or awful that's going to work out in this case, but I'll be doing my absolute best not to need to such tweaks in this case.
2023-03-12
I just did some touch-up on the starfighter. Acting on a hunch, I used a technique
very close to dry brushing (the brush wasn't quite dry enough to call it true dry
brushing). The hunch paid off; the light grey of the lower surfaces covered the much
darker grey and green from the top almost on the first pass, the relatively dry brush
made it possible to build up complete cover, almost as with an airbrush, in seconds,
and the resulting colour is, to my eyes at least, truly identical to the surrounding airbrush work.
2023-03-13
I've completed hand painting on the canopy frames. Somewhat nerve wrecking,
but I managed to avoid the need for serious corrections, and what little was needed,
could be done with a small brush and some plain old tap water; if you're quick enough,
these paints still respond well to it.
2023-03-15
The airplane is standing on it's own three legs. As usual (for my clumsy self)
this took some fudging and bending of parts; the slightest misalignment of the
narrow undercarriage will give a terribly visible difference in height of the wing
tips, and I just can't seem to get them right without cheating.
2023-03-17
The decals have decided to become a proper posterior agony.
There is some pale residue from what appears to be disintegrating backing paper under
the decals. Wiping it off is possible only after the decals are soaked and removed from
said paper, and I rather doubt this will do adhesion to the model much good. I'm using
Humbrol Clear to wet the area intended for the decals, and along the edges, in hopes of
getting the decals to stick properly.
And once on the model, some of them insist on curling up while drying, requiring further
admonissions to behave.
I also managed to damage the rear fuselage. While pushing the engine exhaust into position, I'd noticed it was a tight fit, and thought no more of it, but earlier today, I noticed I'd split the rear fuselage seam. I didn't try a complete fix (asking for trouble so late in the build), but simply fudged it with some filler followed by sanding and touch-up of the paintwork. It came out fairly well, and nicely shows off how well the paint blends in when hand brushed over previous airbrush work.
2023-03-19
The plane bears the markings of a TF-104G of the conversion unit of the RNLAF
stationed at Volkel in 1976.
On the whole, the kit was much easier to build up into a decent Starfighter than I'd expected. The experiment with the paint turned out very well; I've just come back from a meeting of the local IPMS group where sereral people know a lot more about the correct colours for this timeframe, and the colours were considered pretty good. The decals, while being somewhat temperamentful, performed quite well once their dues in cleaning effort were paid.

|
|
|
|