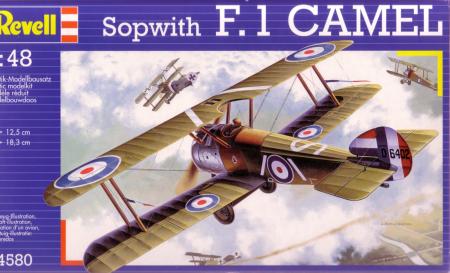
Revell 1/48 Sopwith Camel of number 9 Naval Air Squadron
2005-03-25 Project start
I'm neither into 48 scale, nor into biplanes, nor am I a great fan
of Revell kits, which I find dissappointing far too often, but
sometimes one must make exceptions. Right now, I needed a kit that
would allow me to experiment with rigging techniques before taking
a shot at some of the more serious kits that will require it, and
this kit was cheap and available, so now it's all over my workspace.
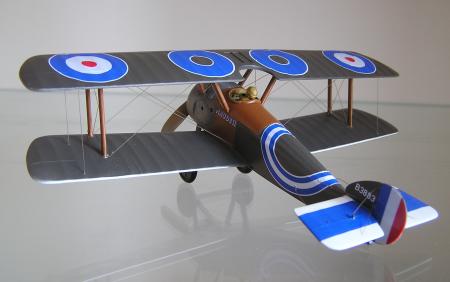
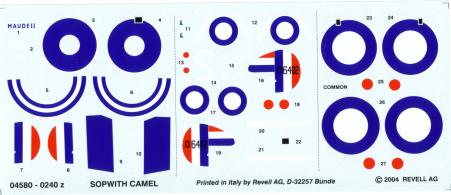
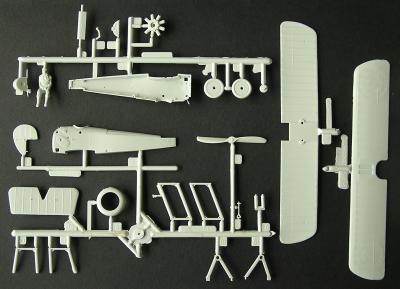
Lets start by saying something nice about the kit: the decals look great.
However, that's about the best that can be said for it. Even in the
picture, the plastic looks crude and klunky, and that's just what it is.
Dry fitting show the parts don't fit all that well either, so I guess
this one is going to put up a bit of a fight. That's alright though,
because at the end of the day, I'm just interested in how the rigging
comes out.
I've glued up the fuselage, than added a generous amount of putty,
which is now ready for sanding. The pilot figure is just too funny not
to include in the kit, and fortunately, it can be inserted once the kit
is completed, so I don't have to finish that one before continuing.
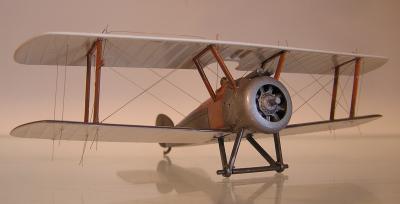
2005-07-24
I've completed construction to the point where the kit could be painted.
As expected, just about nothing fits correctly, but the use of some
strong arm tactics forced the kit into some semblance of a Camel. With
the paint on, it actually looks rather nice. Now, the time for the rigging
has arrived. I'm working with 0.16mm fishing line, and so far, it appears
to be behaving. I'm a bit worried about the various glues I'm using, though.
I've been fixing the line in place with a touch of CA glue, and when dry,
added a drop of clearfix to the attachment point. I hope the clearfix will
behave, and shrink when drying, but this is almost impossible to tell, as
it is very clear, to the point of being invisible. I'll know whether or
not this was a good idea only when the final layer of varnish goes on, and
by then it will be far too late to make any corrections. The CA is also
virtually undetectable at this stage, although I'm certain I hit some
parts of the plane (as opposed to the rigging wire) with that brush as well.
A rather nervous state of affairs, let me assure you.
2005-08-14
I've cleaned up the stubble from the top of the top wing, and the bottom of the
bottom wing, and shot a new coat of primer over the bottom one. So far so good..
2005-08-23
The paintjob is once again complete. Now I'll have to put on some of the decals,
and finish the rigging.
2005-09-30
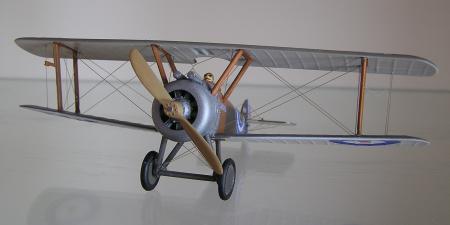
The kit has been completed. Mostly, the rest of the rigging went on without
much of a struggle. The only thing that caused a real issue was the interaction
between CA glue and unproteced decals; the CA wrecked the inks. Fortunately,
this occurred when working on the tailplane, on the blue areas, and there were
other decals in the same colour I could cut up to make a patch. My compliments
to whoever made those decals, by the way: the patches are close enough to
invisible that you have to look very closely even if you know they're there.
The drops of CA and clearfix at the ends of the various rigging wires also
behaved well, that is, they stayed invisible even with the final coat of varnish.
Navigation trail:
home »
others »
Revell 1/48 Sopwith Camel