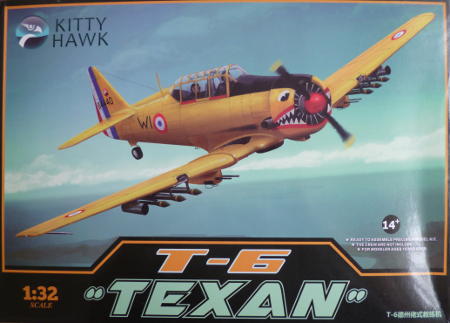
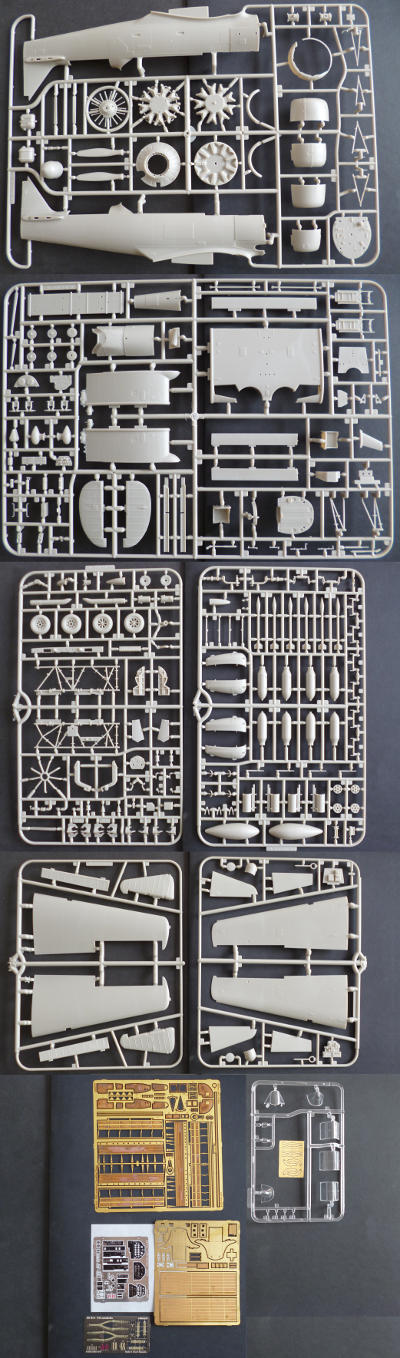
Kitty Hawk 1/32 T-6 Texan
Project start 2016-07-31
Something like a year ago, I digitised some VHS tapes for a colleague. A small
favour from my point of view, but the recordings were precious to him, and he
felt it warranted a reward, and showed up with this kit a few days after I handed
over the files, simultaneously doubling the number of 1/32 planes in the stash,
and the price of the most expensive kit in my stash.
The only proper response to such largesse is to make sure you to the kit justice.
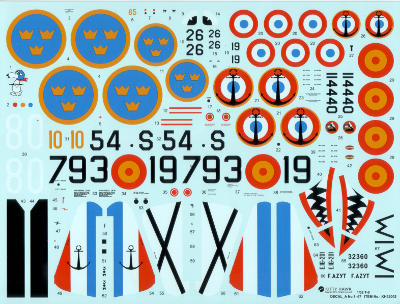
After some serious deliberations, I decided that called for some improvements to
the interior, in the form of a 'Big Ed' etch set. I'm still not entirely certain
I shouldn't be doing this one OOB, but at this scale, PE can really make a difference.
I've been playing with bits of metal for a bit. The Eduard seat buckets are
clearly going to be nicer than the kit parts, if, and that's a big if, I can
get them to stick together without getting blobs of CA and gaps all over the
place. Glue setting in progress, and then some primer will be called for to
really see the results. I might yet end up putting the etched details on the
plastic buckets instead.
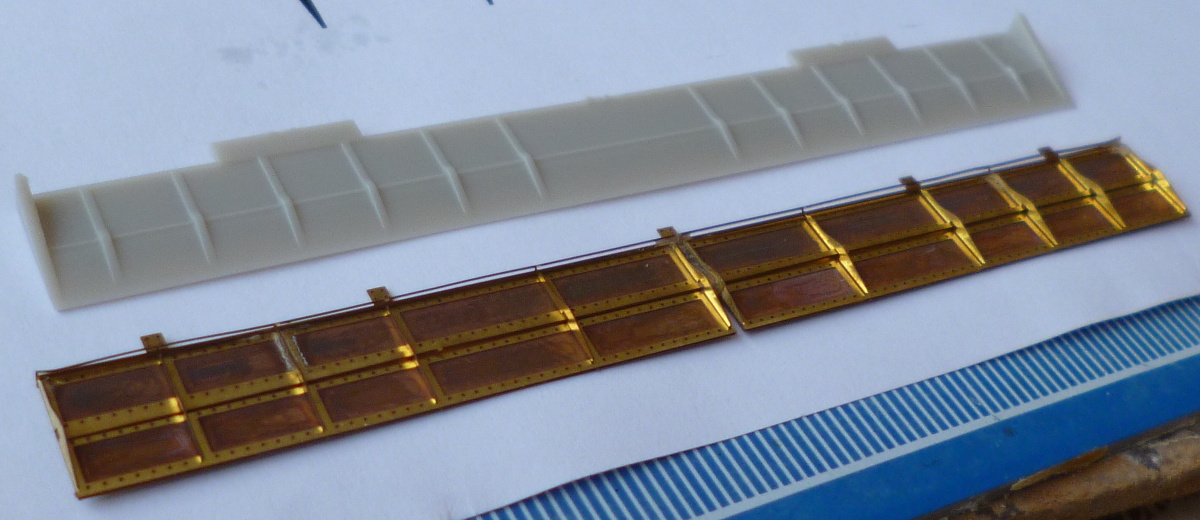
About the etched flaps, however, there is no doubt. After some nerve wrecking
metal folding, the fuselage flap is clearly so superior to the kit part that
even my clumsy fingers can't bring them into the same league..
2016-08-12
Still here, but it's slow and nervous work; the plastic is so soft that any
slip and any over-application of force can ruin a part in a blink.
I think the etched seats are going to work, just some fiddling required before
I'm certain. In the mean time, I've made a start on the rudder pedals.
2016-08-12
I've decided the brass chairs came out well enough, and took the plunge.
They're now irrevocably attached to the plastic frames. Some minor details
left to be added, but nothing that could influence the decision.
I'm getting a really steampunkish feeling from all those brass bits..
2016-08-14
More miniscule fiddly bits today, and so proceeding at tectonic speeds.
Out of frustration with the lack of visible progress, I thought I'd at
least join the halves of the wheels. They seem a bit off to me, so some
reference hunting has begun.
2016-08-15
The original wheels appear to have what I think is called circumferential
thread, but whatever it's called, it's clear what I need. Now, for a way
to make it happen...
2106-08-16
I will probably try to rig up a sort of improvised lathe with the dremel,
and cut the required grooves directly into the kit wheels. I now know I
have a backup plan (Mustang wheels) should I mess up, so I can go wild
(and stingy, in keeping with national tradition)
2016-08-21
The improvised "lathe". Nothing more that a small power tool clamped to
the table, and a pin in a pinvise. The lines cut by the pin turned out
to be too thin. They looked great, until I sanded the burrs of, and then
they were all but gone, so I switched to a small diamond file. That got
the job done well enough.
2016-09-02
I have the front of the engine assembled and painted. Sadly, I got them painted wrong
(easily fixed), and misaligned (unfixable, workarounds will be required..),
the latter due to some very sneaky, hard to spot, but critical details in the instructions.
2016-09-04
I've blinged up the engine a bit. The result is a lot livelier than my original version;
I rather like the change.
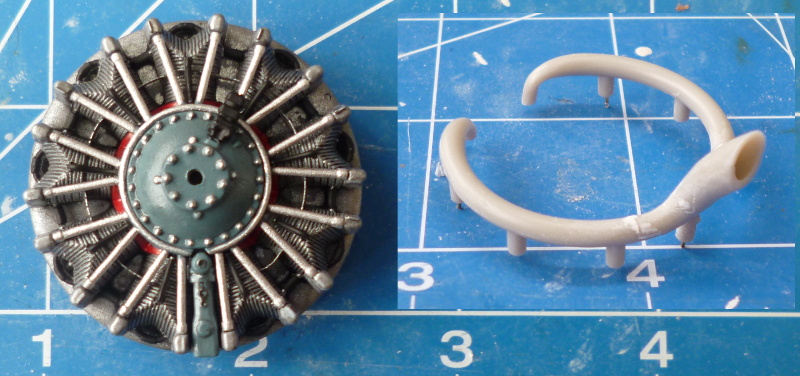
Next to the main block is the collector ring(?), all five ill-fitting parts
of it. I just can't figure out how the folks at Kitty Hawk ever came up with
the way the rear parts of the engine block are supposed to be assembled. There's
a spiky thing (fuel injection?) which has alignment pins for the backplate and
front half, and this ring which sits between it and the backplate. There's a
sort of cowling around those three parts, and the front half of the engine is
then supposed to be attached to the lot. Problem with this sequence is that
there is just no way to align the collector ring with the engine block that
way, or the pre-align it with the backplate. Alignment with the engine block
is shaky even without the complications; the tubing does not line up perfectly
with the cylinder heads, the few locator knobs hinder more than they help, and
all that is before messing up the alignment with the rotation I need due to my
earlier mistakes.
So, perhaps foolishly, I'll be taking a different approach. The spiky thing will
go onto the engine first, followed by the ring which has been given some brass
locators. The result will then be mounted on the backplate, and finally the cowling
will be wiggled around the entire block.
That's all for the future, however, since I'll be going back to some cockpit work
now while the various chemicals on the engine cure.
2016-09-04
I've just spent four and a half hours just making parts out of even smaller
parts, and have very little to show for it. This is partially my own fault
for insisting on etched details, but the kit itself seems to really like
large part numbers. Every tiny bit seems to be made up of at least two even
smaller bits, sometimes without apparent reason, and all those parts need a
bit of work. Fit is rarely perfect, so after joining up the bits that make
up bits some work on the seams is needed. I'm certain the kit will yield up
a nice model, but at a price
2016-09-11
Grrrrr... just spent rather too much time fighting seatbelts. Both the kit
and the Big Ed set contain PE seatbelts. The kit set is rather thick, strong
brass, which will not bend naturally. The Eduard set is thin, springy
unidentified silvery metal, which will not bend naturally. The kit set is
never mentioned in the instructions, which gave me slight hope there might
also be decals (which could have been placed on a nice and malleable chocolate
wrapper), but no such luck. Not happy with this bunch. Paper/fabric plan C
n order, we'll see if that behaves..

2016-09-15
Plan C was in the mail today. Well, part of it; I'm so used to getting
stuff like this in pairs in 1/72 scale that I didn't think/check, so I
now have one safety harness for two seats.. If the first one passes the
test, I'll have to order another set just to complete the kit. On the
bright side, there's a Tiger Moth in this scale also in need of some
straps, so a second order was always going to be needed if the first was OK.
I'm not yet sure of how well these will fold into the seat buckets,
but the first strap sure looks nice..
Quite a bit of work there; 4 pieces of 'strap' and 3 parts of buckle.
Buckle should be taken quite literally here; with the exception of the
central locking mechanism, these are real buckles - why fake what you
can build for real at a reduced scale. Tricky work too, I estimate all
my tools, not to mention my fingers, are about 400% oversized for this sort of thing...
2016-09-16
I built up the right lapbelt, stuck it to the seat, and then brought it
to a most soggy state indeed. Some pushing and poking convinced it to
snuggle down nicely, and it stayed down after a night of drying. I'm
calling this a successful test.
Now, time to complete this set, and order the extras.
2016-09-23
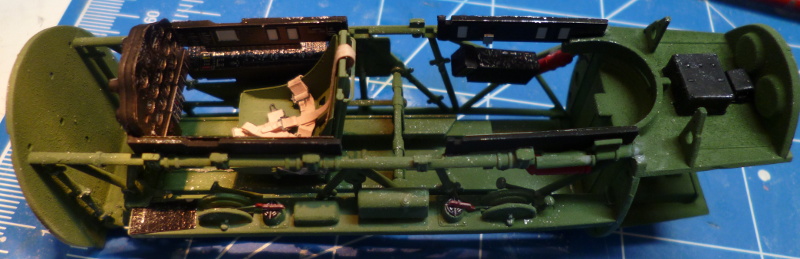
The cockpit module is finally beginning to take shape. To my considerable
relief, it still fits the fuselage halves. I really hope it keeps that up
when the engine is added to the front (cockpit plus engine are a single
sub-assembly) and the etched panelling is added to the fuselage halves.
2016-09-23
OK, that's it, I'm stuck..
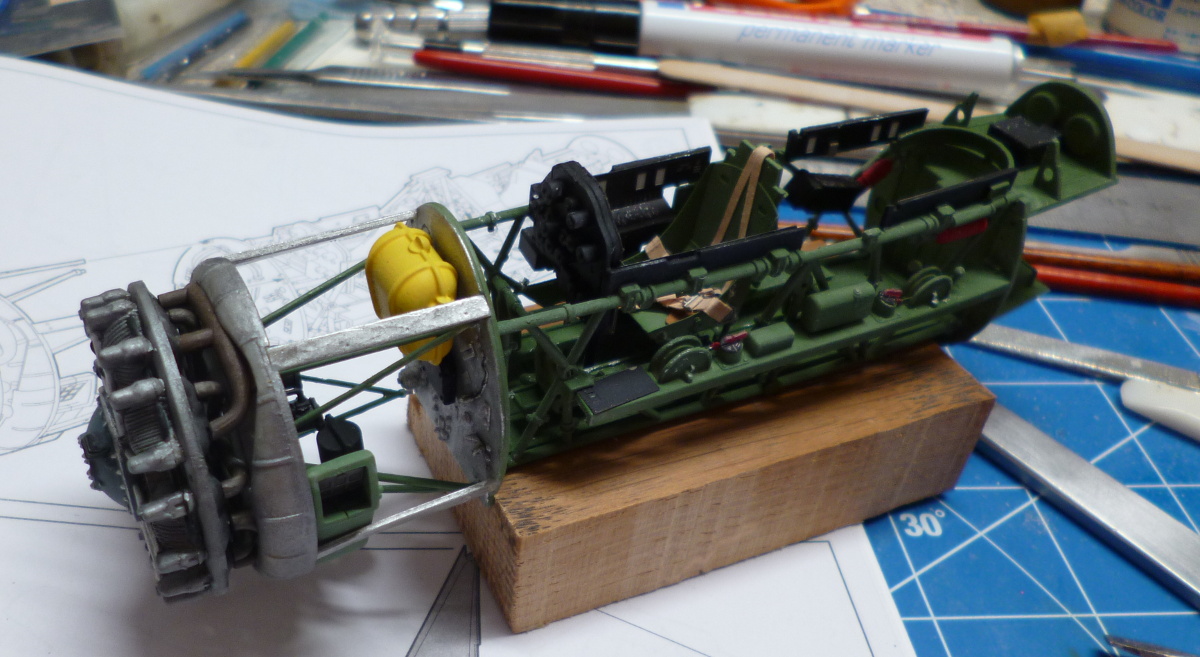
The engine is supposed to be linked to the cockpit module with 4 A-frames
and 3 beams. Due to the way the engine is built, all A-frames have to be
positioned before matching up to the cockpit, to avoid losing the locator
pins (such as they are). Until they are all lined up, I have only thin air
to support them, and nothing to determine the correct angles, never mind a
way of fixing them at those angles.
2016-10-24
As I feared, my attempt to fiddle the engine suspension into position was
a disaster, but rather differently than expected. I'd expected to sort-of
kind-of get all the bits connected as advertised, only to find the complete
assembly to be crooked. Just the opposite happened: There was simply no way
to get all four A-frames lined up, three out of four was the best possible
outcome (which strongly suggests to me that at least one of the parts is either
too long or too short), while two of the beams, which are designed with some
torque in them, can't be lined up with the slots, no matter how you fiddle them.
I suspect the folks at Tamiya could have made this buildable, but for now, Kitty
Hawk doesn't have a chance.
Still, on the bright side, despite one of the A-frames essentially dangling in
mid air, and two of the beams having ended up a bit skewed, the complete module
still seems more than willing to fit inside the fuselage nicely. When both kit
quality and skill fail, luck can be quite effective..
2016-10-25
You know what's really sad about all this? None of it will be visible..
The sides of the fuselage are single piece jobs, only the top in front of the
cockpit is a separate part that could provide a view. The part however, will
be needed to keep the front ends of the fuselage halves together, and so can't
be left loose. I know there's the whole "but I'll know it's there" thing, but
for two or three vaguely interesting parts and a lot of boring rods and bars...?
They could at least have made it optional, by supplying an ugly but sturdy
connectiong part as well as the fiddly bits..
The fuselage halves, by the way, are completely bare on the inside, but the
Eduard set provides beautiful internal panelling, which fits perfectly and
easily without any kind of modifications to the kit parts involved.
2016-10-26
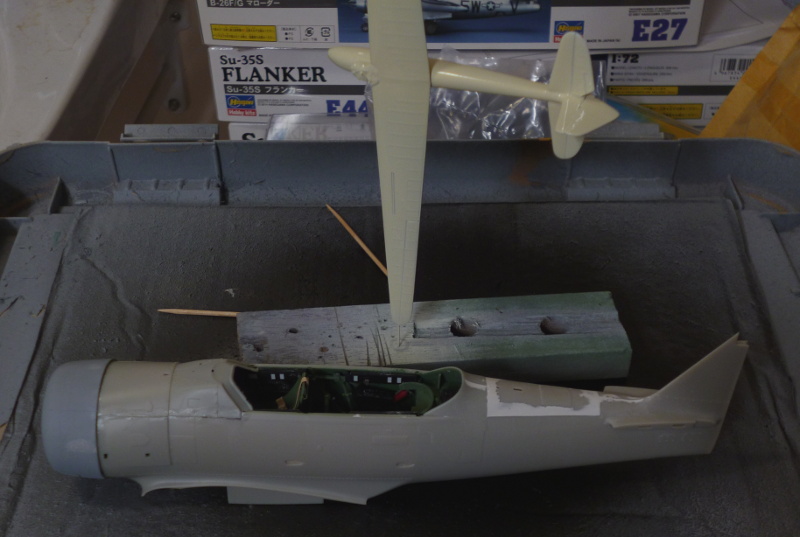
I got to close the fuselage today. Once completely mounted, it becomes obvious
how I did manage to bend the inner module; there's a small, but noticeable gap
between the front of the right fuselage half and the rear of the engine. I'll
force that into place once the front fuselage has been fitted with the top part.
This will hide the engine bay, but also give the fuselage the strength and shape
it needs. i have no idea why there is a similar panel behind the cockpit. The
lids will go on once the current joins have completely set.
In the mean time, I couldn't resist a spot of dry fitting. Big b*st*rd in this scale....
2016-10-28
More bad news from the visibility front: the engine cowling sort of aligns
on three little tabs. Without cement, this would be permanently wobbly, and
with cement, most of the engine detail becomes hidden. I can't say that I
know of another way to design this so that it would look good both with the
cowling off and on, so this is not necessarily criticism of the designers,
but it is a real pity, since that engine is worth a bit of visibility.
I'm going to be a bit harsher on the cowling itself though. It consists of
four irregularly divided segments, with no apparent logic behind the division,
and only the most rudimentary tabs for alignment. Incredibly easy to make a
total hash of, and predictably, it didn't turn out perfectly. Time to pour on the fudgery.
2016-10-30
After all those weeks pretending to be a rather nice kit, the Texan has
suddenly realised that putting up a fight is a real option. So far, I've
mostly been dealing with the interior bit, and modifying parts, and although
time consuming, this was smooth sailing. Things are different now that I'm
dealing with the larger parts of the model. Too many parts just don't match
up. No amount of scraping and fitting can, for example, make the dorsal panel
any wider than it is, or the fuselage halves significantly narrower. So, the
part sits there and gets plastered over with filler, wrecking the surface
detail. The nose panel has a similar problem, although I've read a build
report saying this could be solved by joining it to the fuselage halves under
some tension. Wing to fuselage fit promises to be interesting, and the engine
cowling has been griped about earlier.
And there I was thinking things were going to speed up a bit
2016-11-02
Wringing the cowling into shape went better than expected. It may
have helped that I cut out a 1mm slot in one side to take up the
slack. This, and some bumps resulting from the original locator tabs,
will have to be smoothed over of course, but that seems doable. Some
filler has once again been scattered over the fuselage. After sanding
this down tomorrow, I'll mask up the engine and cockpit areas, and shoot
primer over the lot to see where al this fudging has left me.
2016-11-09
Blending of the rear top panel, and fudgery around the cowling have
progressed to the point where I needed a blast of primer to take a good
look (always a good sign, since it implies I'm down to details). I think
I'll be able to pass this of as a T-6 yet.
2016-11-18
I'm pleased with the way it is handling now. All the big bits are on, not
many issues visible after the primer, and all of those easily fixed. Time
for cleanup and lots of detail work on wheel wells and flaps.
2016-11-24
The wheel wells bit me. The instructions for the etched parts show how to
position them into the assembled wheel wells. Unfortunately, this is completely
impossible, and some of the parts should have been installed before well assembly.
I'll have to start butchering my way through to make room for the remaining parts.
The worst of it is that the sections of the parts that are blocked now will be
completely invisible in any case; their very existence is pointless. Removing
them is nearly impossible though. The parts could easily have been designed in
such a way that they could have been installed in the assembled wells without any loss
of detail, but Eduard chose the lazy path. This is not the first time I've
caught them cutting corners like this, and given their prices, I'm just a tad upset
with them about this.
This project will go on hiatus for a bit, while I get over my grumpyness over the etched bits, and deal with the showjumper, which has a too close for comfort deadline.