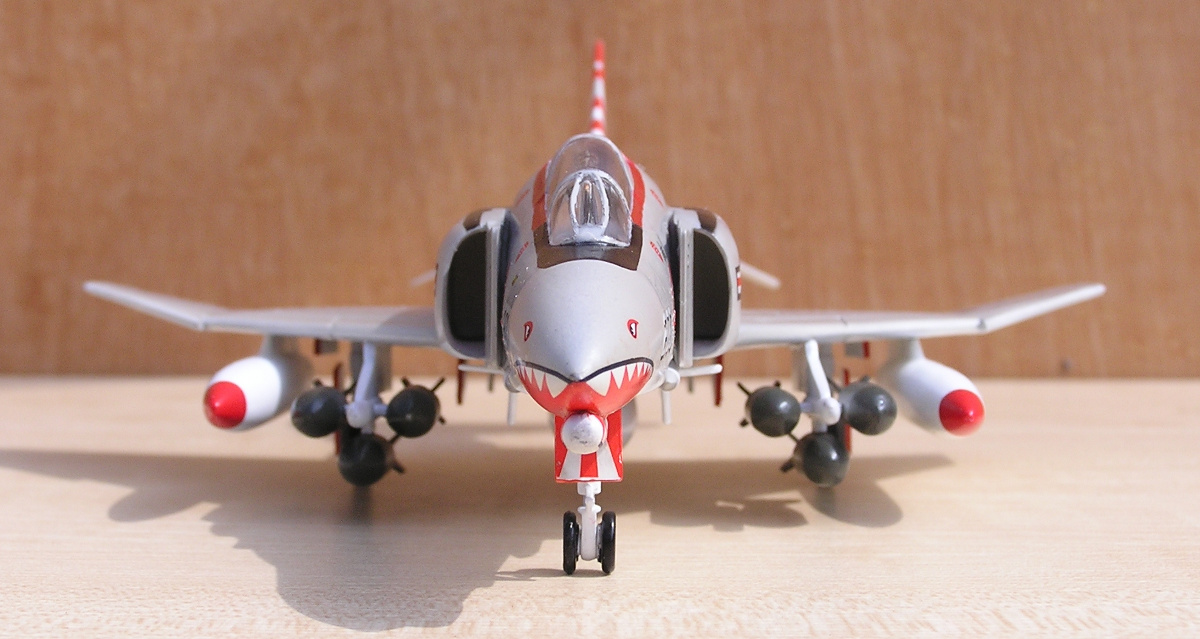
MPC F-4B of VF-111 'Sundowners' out-of-the-box
2003-09-19 Project start
I've been doing nothing but test new techniques, perform plastic surgery, and
fiddle itsy-bitsy cockpit details for half a year, and I've got nothing to show
for it. I like to believe I have some patience, but this is going a bit too far.
I need some sort of visible result, and soon. Mind you, I'm not talking
about a completed kit here, but the sight of a fuselage glued together, with the
inevitable seams puttied up and ready for sanding would be a much needed sign
of progress, especially if it could be followed by that same fuselage with wings
attached a month later.
This particular kit was picked up on eBay while I was getting up to speed with
modelling again about a year ago, after several years of absence. I was rapidly
building up a supply of good quality navy Phantoms, and didn't realise this
was the Airfix kit in a different box. There's nothing fundamentally wrong with
Airfix, in fact, I have many fond memories of it, and I still think that some
of their releases are unsurpassed, but neither applies to their 1/72 scale
'any Phantom variant as long as its really a B' kit. Due to unfamiliarity with US
brands, a few made it into my stash anyway, along with a number of even worse
early Hasegawa J's.
Anyway, once I had them, I decided that maybe they weren't so horrible after
all. They sported spectacular markings, and had some sentimental value. I decided
I would build them straight out of the box, as a kind of souvenir of the time
when both the kits and the planes they represent were the best of the bunch.
With these considerations in mind, picking up this kit at a moment when very
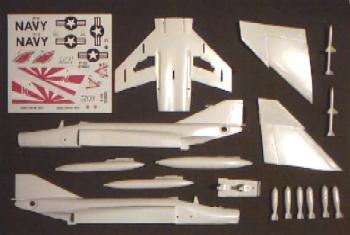
noticeable progress was needed seemed the logical thing to do. Below is a first
look at what's in the box. At this point the ordnance and 'cockpit' have been
assembled, and the gunpods and F-4E nose section moved to the spare parts bin.
|
|
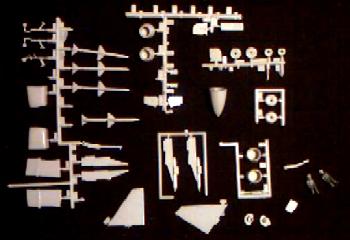
The parts are pretty much as was to be expected on a kit that's been around
since the early 1970's, and maybe even longer. Very sparse surface detail, and
all of it raised. Fortunately, they didn't try to put each individual rivet
on the kit, so if I'm carefull, I might be able to present the kit as it was
intended, and avoid sanding it smooth. The decals were both a pleasant surprise
and a bit worrying. On the one hand, they show absolutely no sign of yellowing,
despite being 20 years old. On the other hand, they're rather badly printed,
and the protective film doesn't register with the actual markings. I'm worried
they might disintegrate upon contact with water. Even if that happens, it won't
be a major loss, as I have several sets of the same marking from other kits and
after market sheets, but it would be nice to use only original components.
I've decided to go with the weapons load as depicted on the box art, with the
addition of the centreline fuel tank. The gunpods are inappropriate to a navy
Phantom, and so are directed to the spare parts department. The other copy of
this kit in my stash is a different MPC boxing, and is shown carrying
Sparrows of the inboard wing pylons. Thus, both reasonable loadouts are covered
by the two kits. I will be doing some work on the Sparrows that come with this
kit though, as they have deep locator trenches dug into them, which I want to
fix before sending them to spares.
2003-12-28
The fuselage halves have been glued together and the nosecone added, and its
beginning to resemble a Phantom. Its also becoming obvious the kit is going to
put up a fight before it gets there. The nosecone really doesn't fit, and in many
places is wider than the fuselage its supposed to line up with. The fuselage
itself is twisted counterclockwise along its longitudinal axis, and the lower
wing part that will connect to it is twisted clockwise. At the front its also
about 0.5mm too thick. I see lots of filler and sandpaper in my immediate future.
Such are the joys of building old junk..
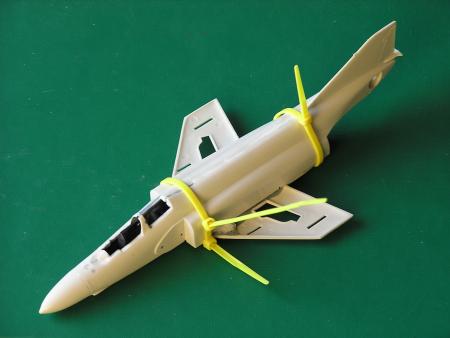
The lower wing has been sanded into shape, but some violence will still be needed
to untwist both it and the fuselage. The contact surface between the two is
minimal, and I fear it won't be sufficient for the glue to hang on to under
tension. I've therefore filled the lower wing with putty, and added plastic blocks
to the insides of the fuselage, to increase the surface available. Next came 5
minute epoxy, which of course takes several hours to harden, and a bunch of
tie-wraps to keep is all together.
I mentioned earlier that I have several different boxings of this kit. One of
those is made from dark green plastic, instead of the white or cream used
for the others. I decided to add some colour to the project, and swap the
upper wing halves and stabilisers for green ones, and do similar swaps
with the other kits. Maybe I've just been exposed to too much Matchbox in
my early days..
The lower wing is now firmly attached to the fuselage, and both seem to have
come out of the process reasonably straight, to my immense relief. I've now
turned my attention to the intakes (which just plain don't fit, and will see
lots of filler before this is over), and the upper wing halves. The wings show
a nasty gap between themselves and the fuselage, so I guess more putty is
called for. (No, this isn't caused by the wing exchange I mentioned, the
originals don't fit in exactly the same manner).
Normally, I don't mind using loads of filler on a kit, but filler implies
sanding, and raised panel lines are somewhat incompatible with that. I'll try
to make the wings as near to perfectly fitting as I can get them before
mounting them. Hopefully, I'll be able to preserve most of the panelling that
way.
2004-01-18
My attemps to get the wing to fit prior to assembly have failed. I don't know how
or why, but despite my best efforts and the fact that the wings look different after
each session of working on it, it still refuses to fit in exactly the same way as
before. I'll just have to accept the fact that I'm a clumsy goof or something.
On the "bright" side, I've found that it doesn't really matter either way. The
panel lines I'm worrying about are something like 0.05mm thick (maybe even less),
and two or three layers of paint will render them invisible anyway. As there's
typically 7 or more layers of paint on any given surface, they're lost no matter
what I do.
I put thin coat of primer over some of the more heavily worked areas to expose
any remaining uneveness (and found some, of course), and stuck the upper wing
halves on. Stuffed the gaps between fuselage and wings with milliput, and treated
the rest of the new joins and old faults with another serving of filler.
2004-02-13
I've spent most of my hobby time of the past month feeding each and every old
instruction sheet in my archive to the scanner. For some reason they all seem
to be printed on wierd paper sizes, and as a result, it takes about six scans
per kit. Anyway, the deed is done, and I'm back on the real job.
Now, I should point out that this also means all the filler I put on last month
has had about a month to dry out properly. After a sanding session, things
looked great yesterday, but since there were some very serious gaps to close
on the lower wing surfaces, these weren't completely smooth yet, so another
helping of filler was called for. Nothing wrong with that, after all, several
thin layers are usually better than a single thick one, and are less likely to
suffer from issues like drying cracks. In theory.
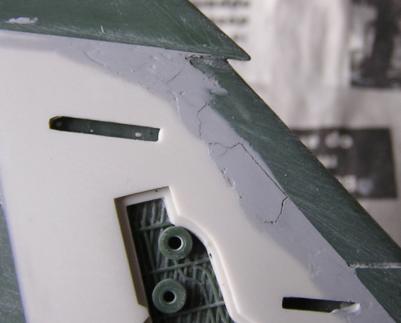
Yesterday's filler had had its day of curing, and so it was sandpaper time
again. Guess what, those cracks the were supposed not to happen, did. Not only
that, but I believe they've gone right through both layers of filler. This
shouldn't happen; after all, the bottom layer had had plenty of time to cure,
all filler came from the very same tube, neither layer was excessively thick.
I'm now having very uncharitable thoughts about this filler (from Italeri, by
the way).
Oh well, time perform some acts of excessive violence on that wing to get rid
of this failed filler.
2004-03-18
Well, much putty was put, and a considerable amount of sandpaper has been worked
bare, but I now have something that is really beginning to look like a Phantom.
The stabilisers went on without much resistance, and the pylons and undercarriage
behaved well. The only thing that got in the way was the pitot tube on the tail.
Strictly speaking it didn't so much get in the way as out of the way, as half of
it never made it to my home in the first place. I replaced it with one of the
wires from the inside of a CAT5 UTP cable, which conveniently had the right
diameter. I've got a suspicion I'll be using that material again in the future.
Anyway, I masked the canopies and windscreen, and shot rattlecan primer over
the bird. To my relief, no glaring errors stand out after that treatment. The
couple of weeks will see the paintjob taking shape in small increments.
2004-03-28
I've been given a rather forcefull reminder of the fact that dust and airbrushes
don't go together. I knew that, of course, but I hadn't realised how hard it is
to get the dust off a brick wall and a course wooden plank. As a result, the
phantom ended up with some nasty stubble on the wings, and needed a bit of
corrective sanding. It also prompted me to do some 1/1 scale work on my
workplace. When that was finished, I found that something wierd had happened to
my paint, and that it was now best used for clogging up airbrushes. Such joy.
All in all I managed to get a single layer of white onto the bird over the
entire weekend. Not really what I had in mind.
2004-03-31
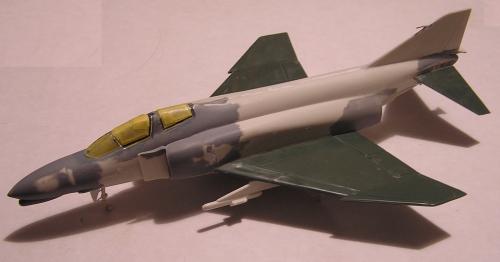
The white is done, and so is the gull grey. At this point, I get extremely nervous,
because this is where I have to remove most of the masking tape, and get to see the
results. This is still new to me, so I await the inevitable mistakes with
considerable trepidation.
The picture to the right shows the result that was hiding under the tape. There
is minor overspray on the red collar and the anti-glare panel, and the masking
tape took away a small speck of white on the right wing control surface, but on
whole, I like what I see, and I think the imperfections can be corrected.
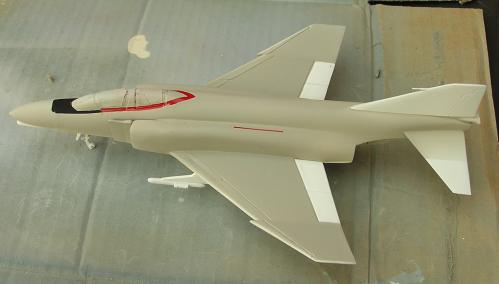
The reason the anti-glare panel and collar are sprayed on is just your basic
desparation. I'd prefer to have those as decals, as they are on many modern
kits, but those just aren't available. The same goes for the walkways on the
fuselage. The thin red stripe visible in the picture is part of what will
become a walkway; the black parts will be airbrushed on later. The burned metal
parts around the tail will also be brushed on at a later stage. For now, I'll
just give it a couple of days to dry properly.
2004-04-09
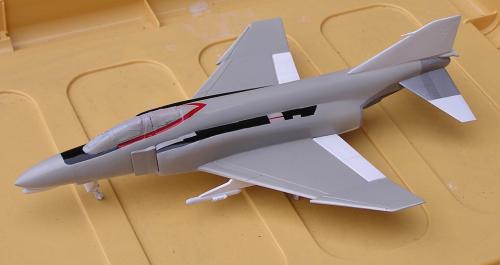
The airbrushing is completed. Mostly, everything seems to have gone well, but the
minor corrections needed when paint comes off along with the masking tape are
very problematic. I can grab a brush and a bottle of paint, and do everything in
my power to blend the correction into the surrounding airbrush work, but try as
I might, the colours never match up precisely. With the initial coat of gloss
varnish on the kit, these corrections are way too easy to spot (they don't show
in the picture, but they're all too visible on the real thing). I really need
a better trick to deal with these issues. I can only hope the difference will
be less noticeable once the final coat of matt varnish is in place.
The remaining bits and pieces are also nearing completion. A few more drops of
paint and glue, and the bird is complete. Aside from the decals that is, and its
the decals that have me worried at this stage. Having seen the results I can get
with setting solution and softener, I would very much like to use those on this
kit as well, but I'm worried the old decals might not be able to take the
punishment. I'll try it out on one of the 'USS CORAL SEA' decals first, as these
are probably the easiest ones to replace should they disintegrate.
The decals betrayed me, but not in the way I feared. They respond quite well to
the setting and softening solutions, but unfortunately, the ink is not in
register with the actual decal film, and parts of the printed image just simply
fall off. There's no way these will ever produce any kind of acceptable result,
so I fed them to the ever hungry trashcan. I then paid a visit to my stash, and
robbed a Fujimi Sundowner of its decals. Despite some reports I've heard these decals
also respond well to the various decalling liquids, so at least I've learned
something in the process.
2004-04-17
The decals are on the plane, as are the remaining bits and pieces. Minor corrections
were necessary in places where the decals didn't fit the plastic exactly, and I
consider myself very lucky that I happened to have an exact colour match for the
red in the decals. After another gloss coat to create an even finish, followed by
a dull coat for the correct effect, I finally unmasked the canopy, and to my immense
relief everything was good enough to be finished with a minimal amount of paint and
toothpaste (to clear some overspray from the rear canopy). The result is that I'm
now in a position to gloat over a nice Navy phantom, and should be considered one
very cheerfull modeller.
A curious thing to note at this point, is that, although I've had USN high
visibility scheme Phantoms at the top of my list of favourite planes for many
years, this is only only the second such plane I've ever built. The only other
one is the Revell rivet monster I did 20 years ago. Somehow, I just never got
around to building one. Funny, that.
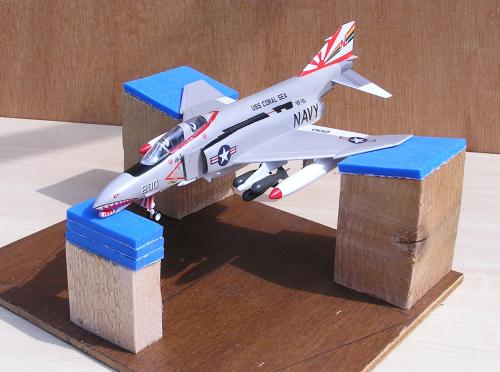 On occasion I take finished models with me for the purpose of showing off, and
I found I didn't have a suitable carrier for Phantoms, which is of course
intolerable for a carrier based aircraft. Since there are going to a lot more
of these birds in the future, I decided to build something specifically for
Phantoms out of a bunch of old wood and an obsolete mousemat.
On occasion I take finished models with me for the purpose of showing off, and
I found I didn't have a suitable carrier for Phantoms, which is of course
intolerable for a carrier based aircraft. Since there are going to a lot more
of these birds in the future, I decided to build something specifically for
Phantoms out of a bunch of old wood and an obsolete mousemat.